In the last installment of our Datsun 510 build, we upgraded a number of parts including our brake system and suspension with the help of Ground control and FutoFab. After months of planning and installing parts, we have finally arrived at beautifying our beast along with rebuilding our wiring harness – no small task in a 40-plus-year-old car.
At this point, you may be thinking that this build is overkill for the average street car. We would resoundingly agree, but excessive planning and building is what is going to take us to our promised land of owning a reliable car that can handle exceptionally well on the track as well as look good doing it, without falling apart in the process. With the focus of the build geared towards improving the reliability of our vehicle’s handing, we haven’t forgotten about paying attention to interior and exterior restoration. In the process, we’ll have to take care of the dreaded electrical nightmare we’ve put off for way too long. In order to do this properly, we must meticulously reassemble, modify, and repair a number of areas.
We’ve had a little over a month to purchase a number of upgrade parts, replacement items and polish all the stainless steel and metal items. You’ll need all sorts of bits to make it work and, as it turns out, some bits are a quite a bit less expensive than others. Luckily, in many cases Datsun 510 parts are readily available and can be found around the world via the internet. One word of advice is to plan well ahead and resist impulse buying on that “must have” item. Doing some comparative shopping can ultimately save you hundreds of dollars. You can thank us later.
Datsunland Socal and Datsport Rubber Seals
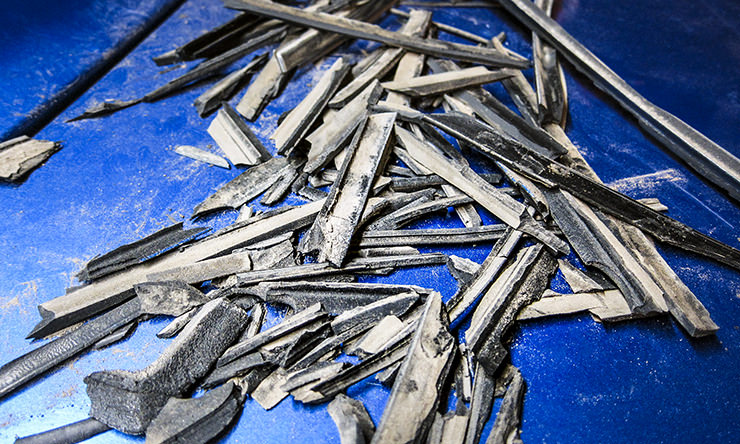
It’s no surprise that rubber seals get old, deteriorate and shrink from the elements – ultraviolet light damage and other weather conditions can turn these parts into dust. Our project car is no exception as every piece of rubber weatherstripping, including the trunk seals, is so brittle that the pieces had to be removed in chunks. The front windshield was just as discouraging as we cut off the seal, only to notice that the underlying areas were bare metal that had rusted and pitted away.

Datsunland Socal is your one-stop-shop for hard-to-find rubber window, trunk, door, and body seal replacement parts. From common replacement pieces such as side marker seals to the harder-to-find gas doorstoppers, Datsunland Socal’s complete weather seal kit has it all.

Datsport, located in Lonsdale, South Australia, has built its reputation on designing and manufacturing a number of Datsun components including their renowned rubber seals. The punishing Australia climate can wreak havoc on a vehicle, so Datsport owners Baz and Tracy Edwards manufacture their seals with the conditions in mind and have created a pliable rubber that resists cracking or shrinking that can occur when the material is subjected to these harsh conditions.
We installed a set of Datsport front and rear windshield rubbers, quarter-window seals and their newly-released windshield glass seal that up until now has been NLA (no longer available) for a number of years direct from Nissan. In order to install both windshield glass and rubber, we used an old school trick using a nylon rope and some dishwashing liquid to pull the gasket onto the frame while a second helping hand guided the frame into position.
Heater Rebuild
As we mentioned in our last installment, we had all intentions to retain the factory heater on our 510. Yes, we haven’t changed our minds yet! Unfortunately, this required sourcing two heater units to make one complete set. We noticed the car’s previous owner had disconnected the heater for no apparent reason, but it became obvious why when we turned it upright and chunks of rust came spewing out from the heat exchanger. We soaked the rusted parts in a solvent solution and flushed the heater core after soaking it for 24 hours in a vinegar bath.
Although much of the heater unit is composed of metal, the upper half is made of plastic, and more often than not is cracked or broken. To prolong the life of the unit, we applied some DEI thermal reflective tape on the inside as a protective barrier prior to spraying the unit with a coat of flat black high-temperature paint.
Headliner
Nothing spells pain in the ass more than installing the headliner in an old-school car. Newer vehicles use a cardboard backing that simply installs onto the inner roof but a car like our Datsun uses metal rods and requires measuring, trimming and stretching the material to ensure it wraps around every edge of the roof – it’s quite the pain to accomplish the task. The pillar trims also required custom fitment of the fabric which, was glued in place with 3M adhesive and secured using clips until fully dry. To acoustically dampen the roof, rear parcel and body panels, we applied Dynamat.
Chroming Restoration
The ’68 and early ’69 model Datsun 510’s came with metal C-pillar vents. What makes this such a highly-coveted piece is that Datsun replaced it with a cheaper plastic vent in the later models. The early-model metal vents were made of pot metal and finding a set in good condition is like winning the lottery. Luckily, we purchased a set in decent condition that had minimal pitting or corrosion; we then sent them off to the chromer for a full restoration. The rear quarter-window inner and outer pull brackets were also restored to their original condition while a set of new handles were sourced from a Nissan dealership located in Canada. As you can see, we couldn’t just head down to the local U-Pull-It to find the pieces for this car – the process required hours of internet searches and expensive international shipping fees.
Tuning Up The Holstery
The 510’s previous owner decided that a white and blue color combination would be the ultimate in show car quality. Unfortunately, the ’80s color selection was an eyesore that we felt needed to be addressed to complete our vision for the car.
We prepped the surface with tape; outlining the area between the fabric and vinyl took the majority of our time. We used a small paintbrush to get in between the cracks and piping for a cleaner look before we sprayed the part with even coats of dye. The final results were amazing but it wasn’t to our liking and we decided to send the rear seats as well as a set of worn-out Nissan R32 Skyline seats we purchased from a colleague to Backyard Upholstery in Santa Fe Springs, California, for a complete makeover, where they finished the Skyline seats to our preference.
Our reupholstered seats in black and gray suede with gray accented stitching were ready for pickup. A quick tip when mounting the driver seat to align in the center of your steering wheel is to use a plumb bob wrapped around a string. Proceed to hang it from your steering console for your final target to obtain your center point on the floor.
Wiring Rebuild and Modifications
Wiring has never been a strong point for us, so when it came time to fix the nightmare that had plagued this 510 for so many years, we hunkered down for many late nights with the trusty volt meter and wiring diagrams. The electrical system in the Datsun 510 is a conventional 12V DC system with a negative earth (also referred to as “ground”). All systems are run from the battery and no relays were implemented from the factory; the car only uses fuses as a means of protection. The unusual wiring setup proved to be a challenge, especially when the previous owner decided that multiple relays, fuses and spliced wiring was the way to repair issues that were present. Repairing and installing new relays has caused a significant delay in the build process.
After spending days of testing for continuity as well as re-soldering connections, the dash harness was complete. Next up on the list was the tricky lighting system.
Converting the engine from the finicky carburetor to a fuel injection system allowed us to remove a number of wires but along the way, we found several issues that raised a red flag – corrosion, mostly – in the factory wiring.
Automotive grade wires are usually made from copper and, as such, are prone to oxidation. Over time, electrical wires will appear to have a white or greenish powder coating on them, and they will lose their conductive properties and cause resistance. This can be very bad if something that is putting out a lot of electricity now has no place for it to go as shown in the photo of the factory fuse box with the melted fuse terminal.
We replaced our OEM dash lights for a set of Datsun 620 pickup truck headlights and wiper switch with fiber optic dash light. A quick cleanup of the corroded terminals and modification to the switch panel and wiring pinout netted us with illuminated switches that prevents fumbling around at night to activate the lights.
Here’s a wiring tip that’s quick and easy and can prevent wire corrosion. After you solder the wires together, cover the area with silicone prior to shrink-wrapping the connection. This process will promote an air tight seal.
Retro Fuse Box
Paying homage to the Datsun gods, we wanted to keep the old school appearance of the fuse box but modify it to accept modern fuses. After toying around with the thought, we came up with a clever solution to use two fuse distribution blocks and stuff them into the factory fuse box. We followed the original wiring layout and discarded the old damaged box.
A quick mockup of the electronics that will be mounted to our passenger side kick panel. Definitely some old school with a little new school flavor!
Gauge Customization
We pillaged a spare gauge cluster to install a set of Speed Hut Revolution gauges. The Speed Hut speedometer uses GPS. This was a must have item for our vehicle since our soon to be installed Nissan S15 6-speed transmission obtains vehicle speed from the rear differential which we will not be using. We also liked the fact that the Revolution tachometer has a built-in shift light and all their gauges have min/max peak holds and a peak warning LED.
Stay tuned for the next installment as we finalize the wiring, weld up custom seat brackets and install our carpet and get closer to completion of the Old School Labs machine.

