The Mustang in this article has been my ongoing project car for the last five years; during that period, it has seen many modifications to its various systems. One of the areas where I have focused a great deal of attention is on the exhaust system. The exhaust note is such an essential part of a performance car; after all, you spend the entire time you’re driving listening to it. I’ve had eleven different exhaust configurations on this car, including four different axle-back muffler systems, three different midpipes, the original factory manifolds, long-tube headers, back to stock ceramic-coated manifolds, and with and without resonators in the over-axle pipes. I settled on Borla’s S-type axle-back system but have been going back and forth with the components in front of it.
As you might imagine, I’m tired of screwing with the exhaust system on this car. I had the car on the dyno last year after some changes and discovered that I was leaving a lot of power on the table with the factory manifolds on the car. I considered the change all winter, as I had some fitment issues with the first set of long-tubes I had installed, which is why I swapped back to the ceramic stockers.


In this article, configuration number 12 is on deck: a new set of 1 7/8-inch-diameter long-tube headers from American Racing Headers to match up with the other components in the car.
The parts are simple for this project. I ordered American Racing Headers’ 1 7/8-inch Long System [PN MTC5-11178300LSN], which comes with the following: an X-pipe designed to mate up with the factory axle-back system, new gaskets, bolts, oxygen sensor extensions, and clamps.
I have learned through my exhaust system swapping on this car that the factory oxygen sensor harnesses are long enough for the sensor placement on long-tube headers, so I didn’t need to use the extensions. Also, the stock multi-layer steel exhaust gaskets were new the last time I swapped to the stock manifolds. In my experience, these will work OK through a couple of changes, so I decided to take my chances and re-use them rather than the supplied gaskets.

Lastly, I ordered the system right after the Coronavirus shutdown hit, and ARH did not have the H-pipe system in stock that I wanted. I ordered the X-pipe system with a plan to adapt it to the existing Lethal Performance H-pipe that was on the car, as I prefer the deeper tone of an H-pipe to the higher-pitched sound from an X-pipe. I took a gamble, hoping that since there were only so many ways to route the exhaust under the car that it would be an easy task to mate the two. Excuse the melted plastic bag on the passenger side—of course, that happened on the test drive after I installed the H-pipe last year.


The 1 7/8-inch header tubes are crafted from 304 stainless steel and theoretically will outlast the car. The pipes flow into a 3-inch collector outfitted with a center spike—which, for some reason, was really hard to photograph—to help the exhaust flow through the collector and minimize turbulence. One feature I like on these is the slotted flanges at the head to simplify bolt installation. After the collector, they provided the lead tubes and the X-pipe; more on that shortly.
In a future article, I’ll detail the installation and technical aspects of a pair of high-flow performance catalytic converters from G-Sport Emissions Systems, to do my part for the environment without losing power. A side benefit of adding the catalysts is that I won’t have to change my clothing anymore if I start the car in the garage with the door closed.
The Install
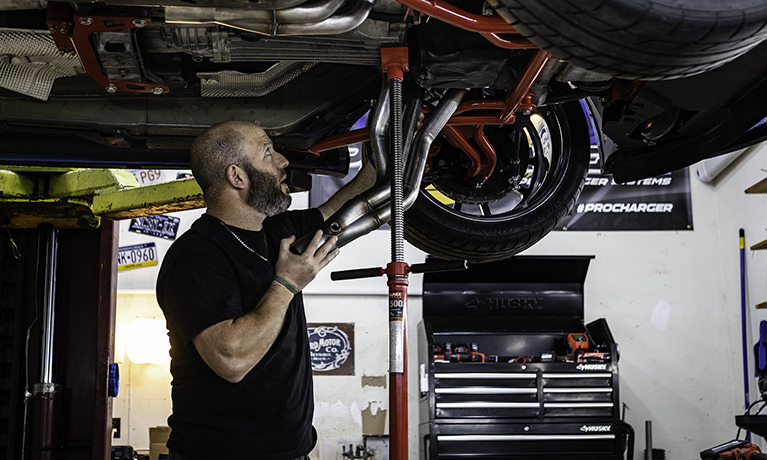
Let me start by saying that this job can be done in several ways. I’ve spoken to many enthusiasts who have completed the work on jackstands, dropping the K-member to provide added clearance. Others leave the suspension intact and just work around it, which can add quite a bit of time to the job but saves you from having to check and realign the car. Since I’ve already had headers in and out of the car—and I have a tubular K-member from BMR Suspension—I chose to leave the chassis intact and work around it. Since I have a lift in the garage, it’s easy for me to just pick along for an hour here and an hour there on a project without having to worry about the car going back together to drive it somewhere.
It’s important to note that you’ll need a substantial assortment of wrenches for this project. I used just about everything in my toolbox, from gear-wrenches to stubby wrenches to just about all of my ratchet and extension combinations. Even with the extra room afforded by the tubular K-member, there are still some spots that are difficult to reach for one reason or another.

To install these headers, you’ll need to remove and disconnect several items. First, you have to find a way to support the engine. Since I used a lift for this project, I just placed my pole jack under the transmission bellhousing. If you’re doing this in the driveway, an engine support bar that straddles the strut towers and gets chained to the engine is probably the best way to do it. You can procure one of these for around $75 from a variety of sources.


Both motor mount brackets come out of the car, the steering shaft is disconnected from the rack, and the starter gets removed. One of the most frustrating parts of the entire install is getting the top bolt out of the starter. You can’t see it and can barely feel it; I ended up using a combination of a ratchet with a couple of extensions and a 10mm swivel socket to pull it out. Some guys opt to leave it out upon reassembly as there are still two bolts holding it in, but I put it back because I hate having extra bolts left over at the end of a project.


With the motor mount brackets and everything out of the way, removing the factory manifolds becomes a piece of cake. At this point, I had about 90 minutes invested into the project and was ready to install the new headers. That’s when the unexpected twist occurred. Every project has one.

Even with nearly three decades of experience working on Mustangs, I still made a mistake that ultimately caused me to have the new headers in and out of the car a couple of times. Last time I installed a set of long-tube headers on this car, I re-used the stock exhaust studs as they made the process simpler. I tried that this time, and after putting the passenger-side header in, I realized that it was impossible to put a nut onto the top stud for the second tube due to interference between the tube and the nut. I had to buy a reverse Torx socket set to get the right tool to remove the studs. A tip: spray the studs down with some PB Blaster or WD-40 and let them soak for a little while before you try to take them out. I figured I’d pull out the offending stud from above that one tube and any others that might cause issues during the install and just use a mixture of studs and bolts for the install.


Then I made the second mistake that cost me a couple of days. What I didn’t know heading into the project is that there were two different exhaust bolt-hole thread specifications for the Mustang that changed in the middle of 2011. Early 2011 cars received M10x1.25mm coarse-thread studs with a midyear switch to M10x1.50mm fine-thread that continued through the Coyote engine run until the end of 2014. I went to put the first bolt in, and it was wrong; since I didn’t have a thread-pitch gauge, I assumed that I had an early-run car and they shipped late-run bolts—which made perfect sense in my head—so I rushed off to the local speed shop to order a set of M10x1.25mm bolts to fit the early cylinder head. Then I went back home to put the headers into the car for the second time using the studs I thought I’d keep.
For $22, I was in business, or so I thought. No harm, no foul. The next day—Friday—the bolts showed up, I rushed over there to get them, brought them home, ripped into the package, and bam. Same bolts I already had. If you can picture a facepalm, you can imagine my reaction as I realized I needed the M10x1.50mm bolts. So I jumped onto McMaster-Carr’s website, found the right ones (M10x1.50mm, 25mm long, PN 93474A222) at $6.14 for a pack of ten, and ordered two bags, shipped Next Day Air for Saturday delivery since I wanted to get the project wrapped up. $12.28 worth of hardware ended up costing me $58.20 with the shipping included, and if you count my gaffe from the previous day, I spent $80.20 total for the 16 M10x1.50mm bolts that I needed. Isn’t working on cars fun?


Then, once I started wrestling with it, I decided that I wanted to remove every stud and just roll with the bolts throughout because I hadn’t facepalmed enough with this project. So out came the headers, I pulled all of the studs—luckily none of them fought me—and got ready to put the headers into the car yet again, starting with the passenger side. This step is where the slotted bolt locations come in handy because you’re able to put in all of the top-row bolts and the gasket without ever lifting a header off the ground. I left about a half-inch of threads on each bolt peeking out of the head, lifted the header into place, and tossed another bolt in the bottom row to hold it up in place. From here, it was just working around the header to secure the other bolts, tightening everything down snugly, and moving to the other side to do the same thing. Reinstall the motor mounts and brackets, reinstall the steering shaft and starter, and the headers were in the car. I moved to the mid-pipe section, and to my delight—there’s no other word to describe it—I discovered that my Lethal Performance H-pipe mated right up with the elbows from the ARH X-pipe kit to finish off the exhaust. I was able to mate those pieces together, then get the car running and off the lift while I awaited the installation of the catalytic converters.


All in all, it was a relatively simple install made difficult by the fact that I didn’t have the right bolts. This situation presents a problem only for some 2011 owners, and it’s easily remedied using the McMaster-Carr part number referenced earlier. I test-drove the car, came back, let it cool off, checked to make sure the fasteners were still tight and called it a day. Well, three days. There is a definite power improvement over the stock manifolds, although I have not been back to the dyno to verify. I have another project on this car coming soon that will require dyno time, so I’ll see what kind of improvement they made at that point. I hope you enjoyed reading about my escapades!

