It felt like only yesterday that my dad took me to my very first track event held at Laguna Seca – it was there that I came across an unusually boxy-shaped car known as the Datsun 510. Loud, underpowered, yet bold in stature, the 510 was the dangerous uncle your parents warned you to stay away from. The 510 immediately piqued my interest as I watched this machine dive-bomb through turns 8 and 8A, otherwise known as the infamous “corkscrew” of Laguna Seca.
Mind you, I was only 10 years old at the time, but what I witnessed had me in utter disbelief. How could it be possible? This tiny 510 was handling like it was on a set of rails. Sure, it wasn’t the fastest or flashiest within the pack, but this Datsun left a lasting impression upon me that has remained even to this day. Saturday morning cartoons were never this exciting!
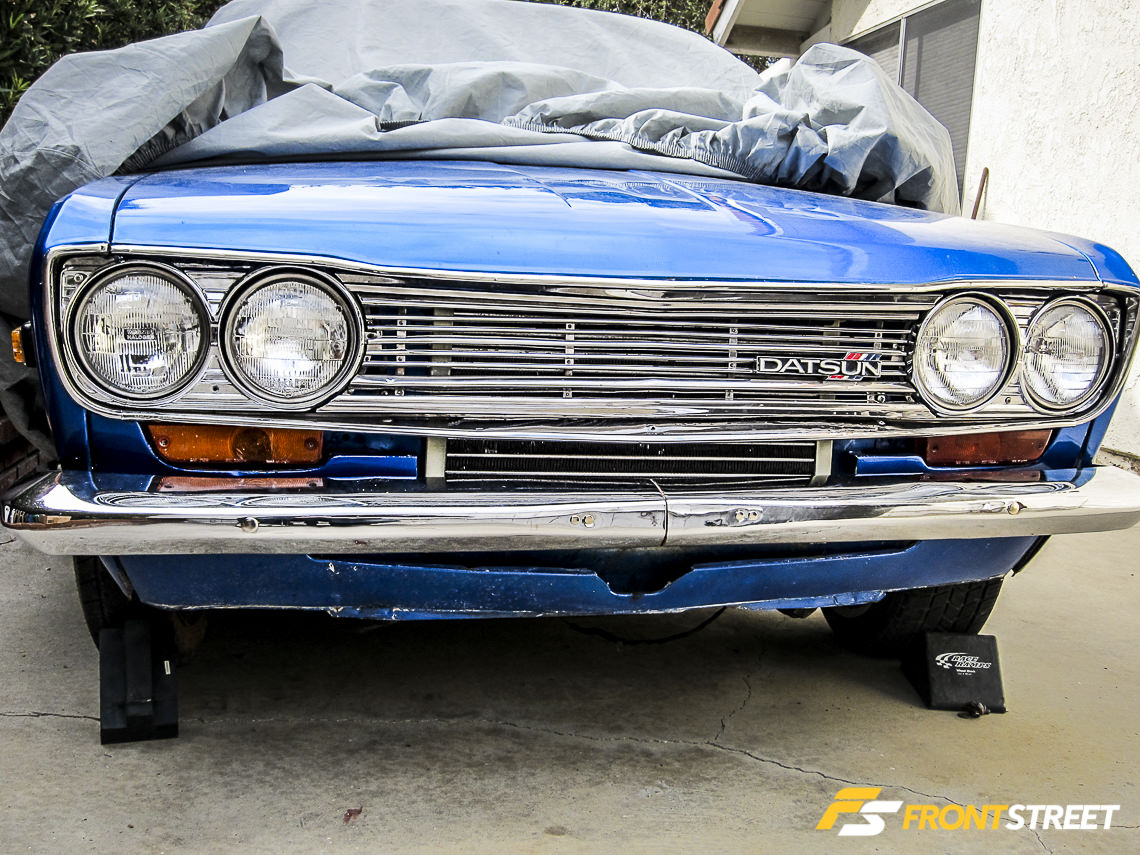
It’s been nearly 30 years since that infamous day. I never imagined I would be behind the wheel of my very own Datsun 510, but fantasy quickly became reality four years ago when I came across a listing on Craigslist. Tucked away inside a garage covered under boxes and a layer of dust and grime, I found an inexpensive candidate: a mildly-stock, somewhat unmolested and clearly unloved ’70 Datsun 510. While the 510 was complete, fully functional right down to the factory air conditioning and engine compartment light, 40-plus years of environment conditions had left the poor car battered and bruised.
Buying a ’70s car isn’t as simple as firing up the computer and picking your favorite interior and exterior colors on automotive websites. Finding the right car involves commitment and knowledge of the vehicle, as well as knowing what you’re getting yourself into. We’re in it for the long haul with this project and don’t plan on settling on driving around a rusty turd that’s slammed to the ground with some “flush fitment” wheels.
Within days of purchasing the car, we began cleaning up the rat’s nest of wires that plagued both areas under the dash and engine compartment. Blue wire loom sheathed hundreds of wires that were precariously twisted together and taped off. If you’re like us, you probably lost count of the number of relays that were ghetto-rigged into the engine harness. Our initial goal was to clean up the wiring to factory condition but since it was in such poor condition, we plan to replace it with a universal wiring kit in the near future.
Because rust is a reality for most decades-old project cars, especially budget-friendly ones there is a great chance that rust will be present prior to restoration. Cars of the early ’70s offered little in terms of rust protection straight from the factory. Because of that, we assessed the structural integrity by stripping the machine in search of any incriminating rust or hidden collision damage. To clarify; when we say surface rust, we’re not talking about that common, simple-to-sand-off layer that resembles a reddish brown color. We were checking for the areas that transform from the reddish brown color to a more corrosive form type of rust that begins to show metal-pitting which will eventually lead to holes.
Philip Chase provided us with welding expertise by firing up the trusty Millermatic 211 MIG welder to stitch-weld the entire engine bay and chassis for improved rigidity and eliminate flex on our 40-plus-year-old car. I tackled the rust issues using a 150-grit wheel to remove corroded areas. It should be noted that a metal grinding wheel is best for removing the actual rust itself but you need to be careful with abrasives because it can remove a lot of material very quickly.
Make sure you don’t overdo it, and work very slowly. This is an important step because, aside from removing the last of the rust, the metal grinding wheel will smooth out any pock marks or pits that the rust has left in the sheet metal. The grinder came in especially handy when addressing the floor boards. The previous owner used a thick foam material to cushion the carpet; unfortunately this also caused a sponge effect that wicked up moisture and water which in turn accelerated the rust process.
The more we tore apart the car, the more rust we found, but none seemed to be as severe as the damage to the rear quarter panels. The lower section of the rear quarter panel behind the rear wheel opening is a common rust trap for 510s. Water gets trapped in the boxed section behind the outer sheet metal and the trunk floor and has no place to escape, eventually rotting out the entire panel.
Our fears became reality when we noticed bubbling from under the paint. The previous owner decided to patch up the rusted area with body filler, which was a temporary solution; all it took was an incision with the chop saw to reveal the grim discovery. If you find rot on your automobile you will probably need the assistance of a fabricator or will need to replace the part or panel all together. Luckily, we were able to source OEM replacement panels for both driver and passenger sides from a donor car.
Prepping the part to be welded is the most important step – you just can’t cut any corners here if you desire a high-quality final product. It’s critical to ensure the metal is clean. We used Phosphoric Prep and Etch to neutralize the rust and etch the metal surface prior to painting. POR-15 was then applied to the treated surface to seal and protect the surface. The paint dries into a rock hard finish that’s resistant to both chemicals and moisture to ensure rust won’t reappear. Eastwood’s Extreme Chassis Black adds another layer of protection to the underbody. For the harder-to-reach frame areas, we used Eastwood’s Internal Frame Coating. The green coating consists of phenolic resin that helps to penetrate, convert and encapsulate while the zinc phosphate seals the metal to prevent future corrosion.
Using the Millermatic 211 with voltage control helped minimize blowing holes though the metal panels when butt joint welding. The key to repairing in this situation is to use a skip-welding technique (welding in short bursts every few inches) to minimize heat buildup, which warps the steel. Long steady weld performed on thin body steel will surely burn through or warp the panels. We used a cut-off wheel to carefully trim the welds and finished it off with a sander before using plastic filler to finish off the area.
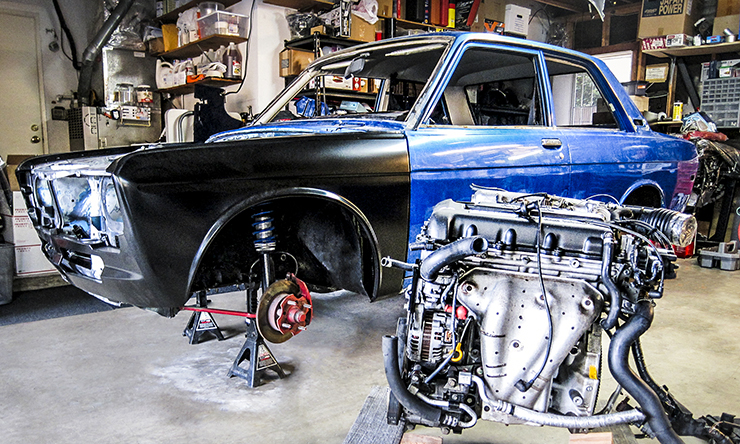
With all the rust areas taken care of, we focused our attention on replacing the badly-damaged front fenders and valance. A junkyard find that looks good from the outside quickly revealed its ugly head once we flipped the panel. A shoddy side marker light patch, some fiberglass cover-ups and body filler towards the bottom panel indicate a cover-up of the rust. We moved on to plan B and contacted FutoFab for a set of their aftermarket production fenders and valance. As the Datsun 510 nears 46 years since its US debut, finding good parts can become a daunting task. Until now, sourcing reproduction body panels meant having to settle for either used junkyard parts or fiberglass molds. Futo Fab offers a number of steel body panels that offer exceptional fitment and OE appearance – this step saved us a bunch of time and effort, although it did lighten the ol’ wallet.
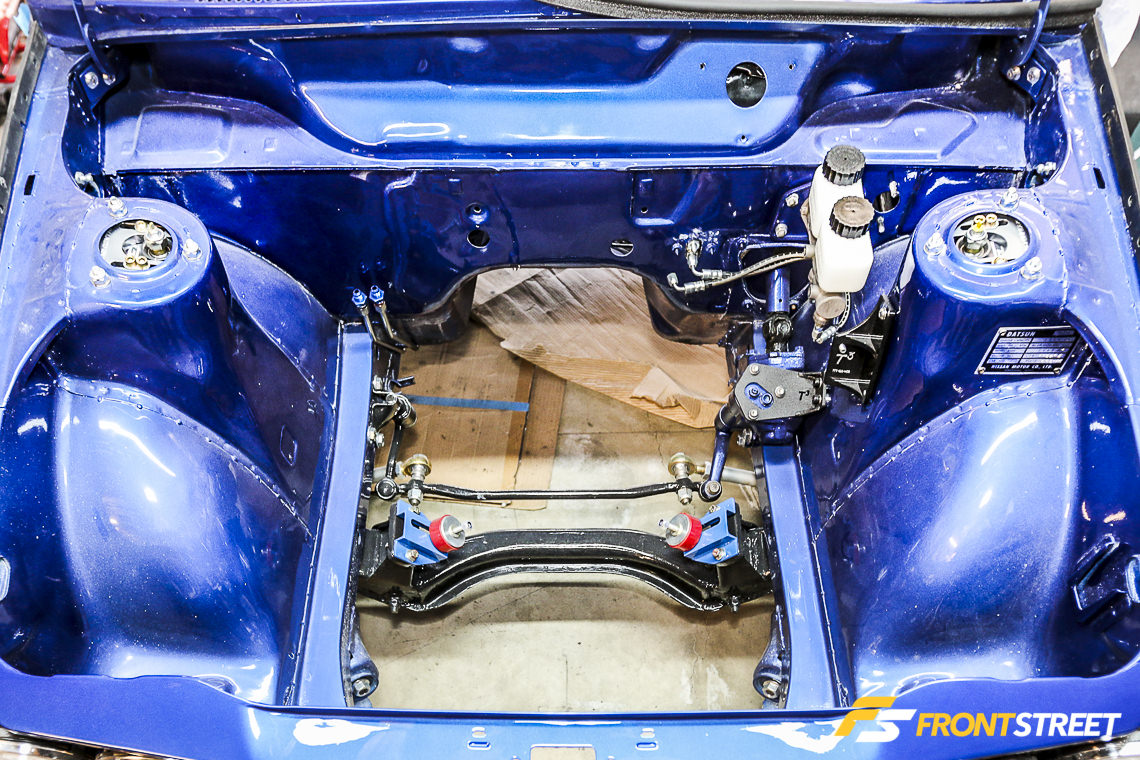
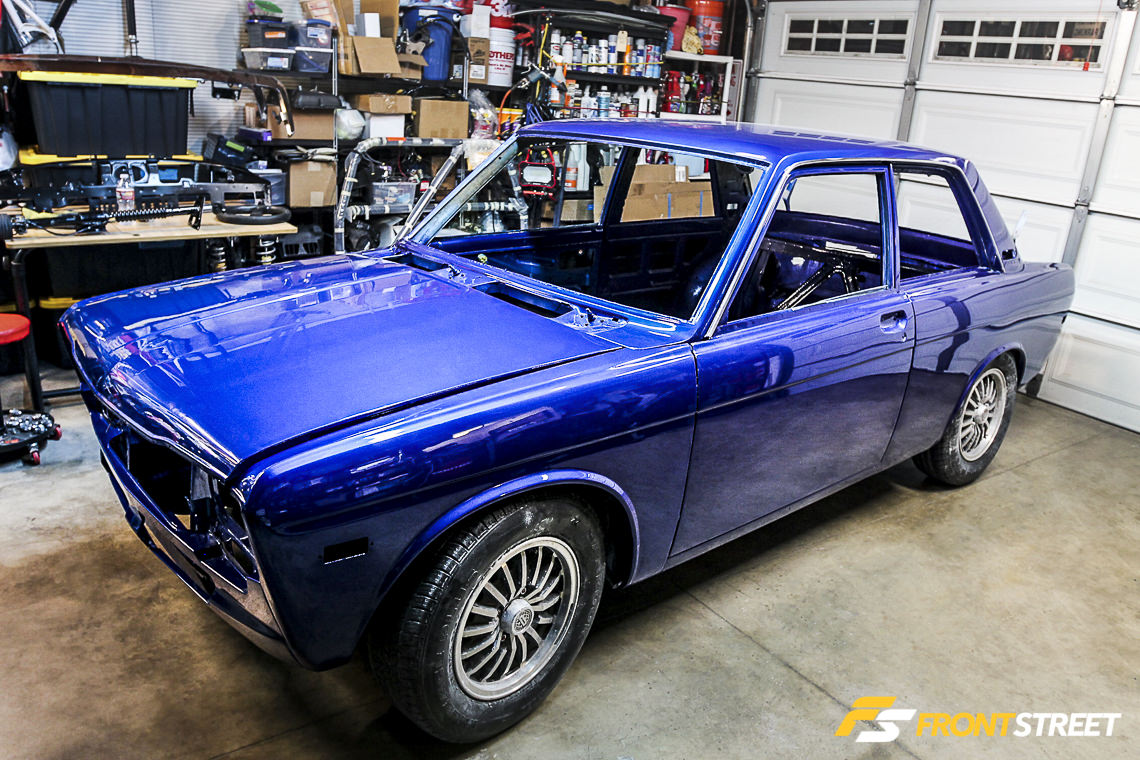
The 510 was loaded up by Emergency Hookers Towing and sent to the body shop for its final makeover. Chuck’s Creations Paint and Autobody, located in Santa Fe Springs, CA, provided a fresh makeover to the Datsun’s body and paint. Chuck smoothed out many years of dents and dings before his son Joey prepped and slathered the 510 using a custom mix of Nissan metallic blue paint. Unfortunately due to time constraints, some of the key components returned home without being painted. We took matters into our own hands and finished off the remaining paint and body work in the garage, beginning with the trunk and finishing off the engine bay to wrap up the new hue.
One main reason why people love cars so much is that they offer a great way to express themselves. Whether you’re a Datsun aficionado or specifically a 510 fan, nothing beats the fun of owning a classic car and drivers who own classic cars know the many joys they can bring. Stay tuned for the next installment as we upgrade multiple suspension components sourced from various Datsun cars including a R200 rear end installed with a custom KAAZ limited-slip differential from a Nissan 240SX.

